Showing posts with label plaid. Show all posts

Friday, January 15, 2021

Plaid Pinafore

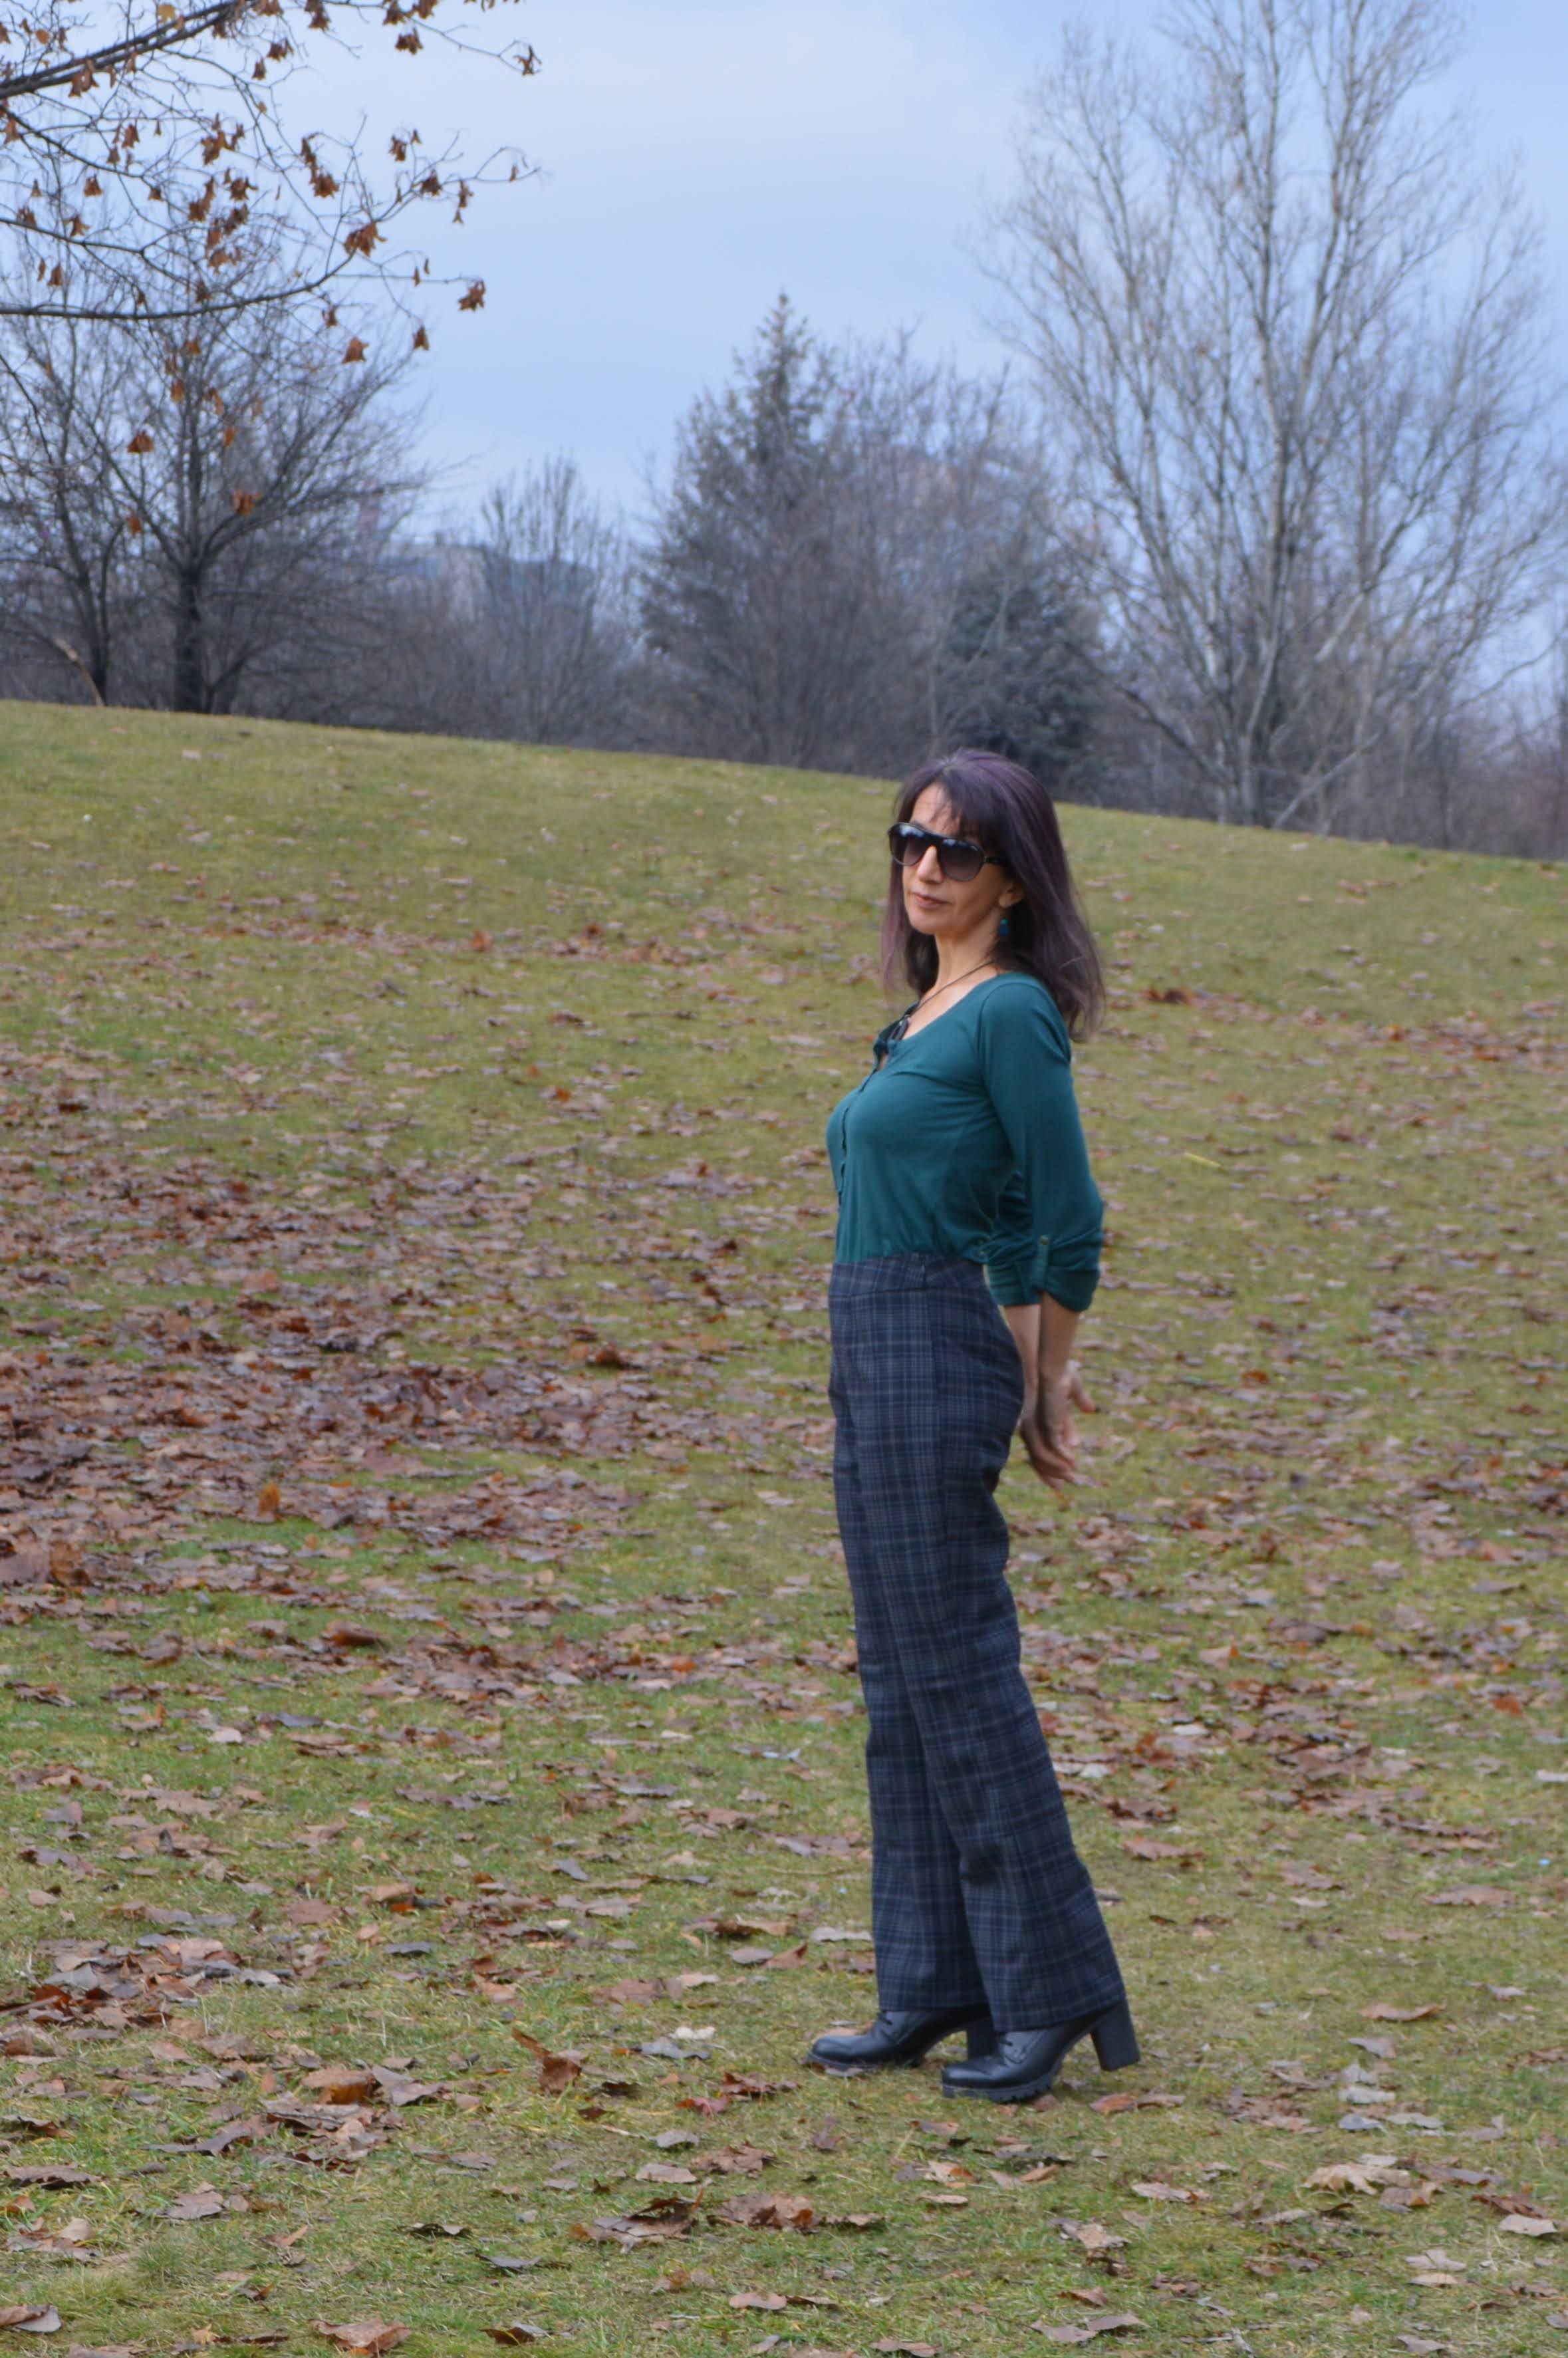
Like so many seamstresses, I was very impressed by the styling and fashion choices in The Queen's Gambit and I've decided that I need more 60s vibe feminine clothes in my wardrobe. Not that I have many places to dress up for - today's dress up, apart from the photo session, was for the weekly shopping in the local Lidl :))) But if I worked in an office, I would definitely wear that pinafore dress to work.

The pattern is from Shkatulka, a 
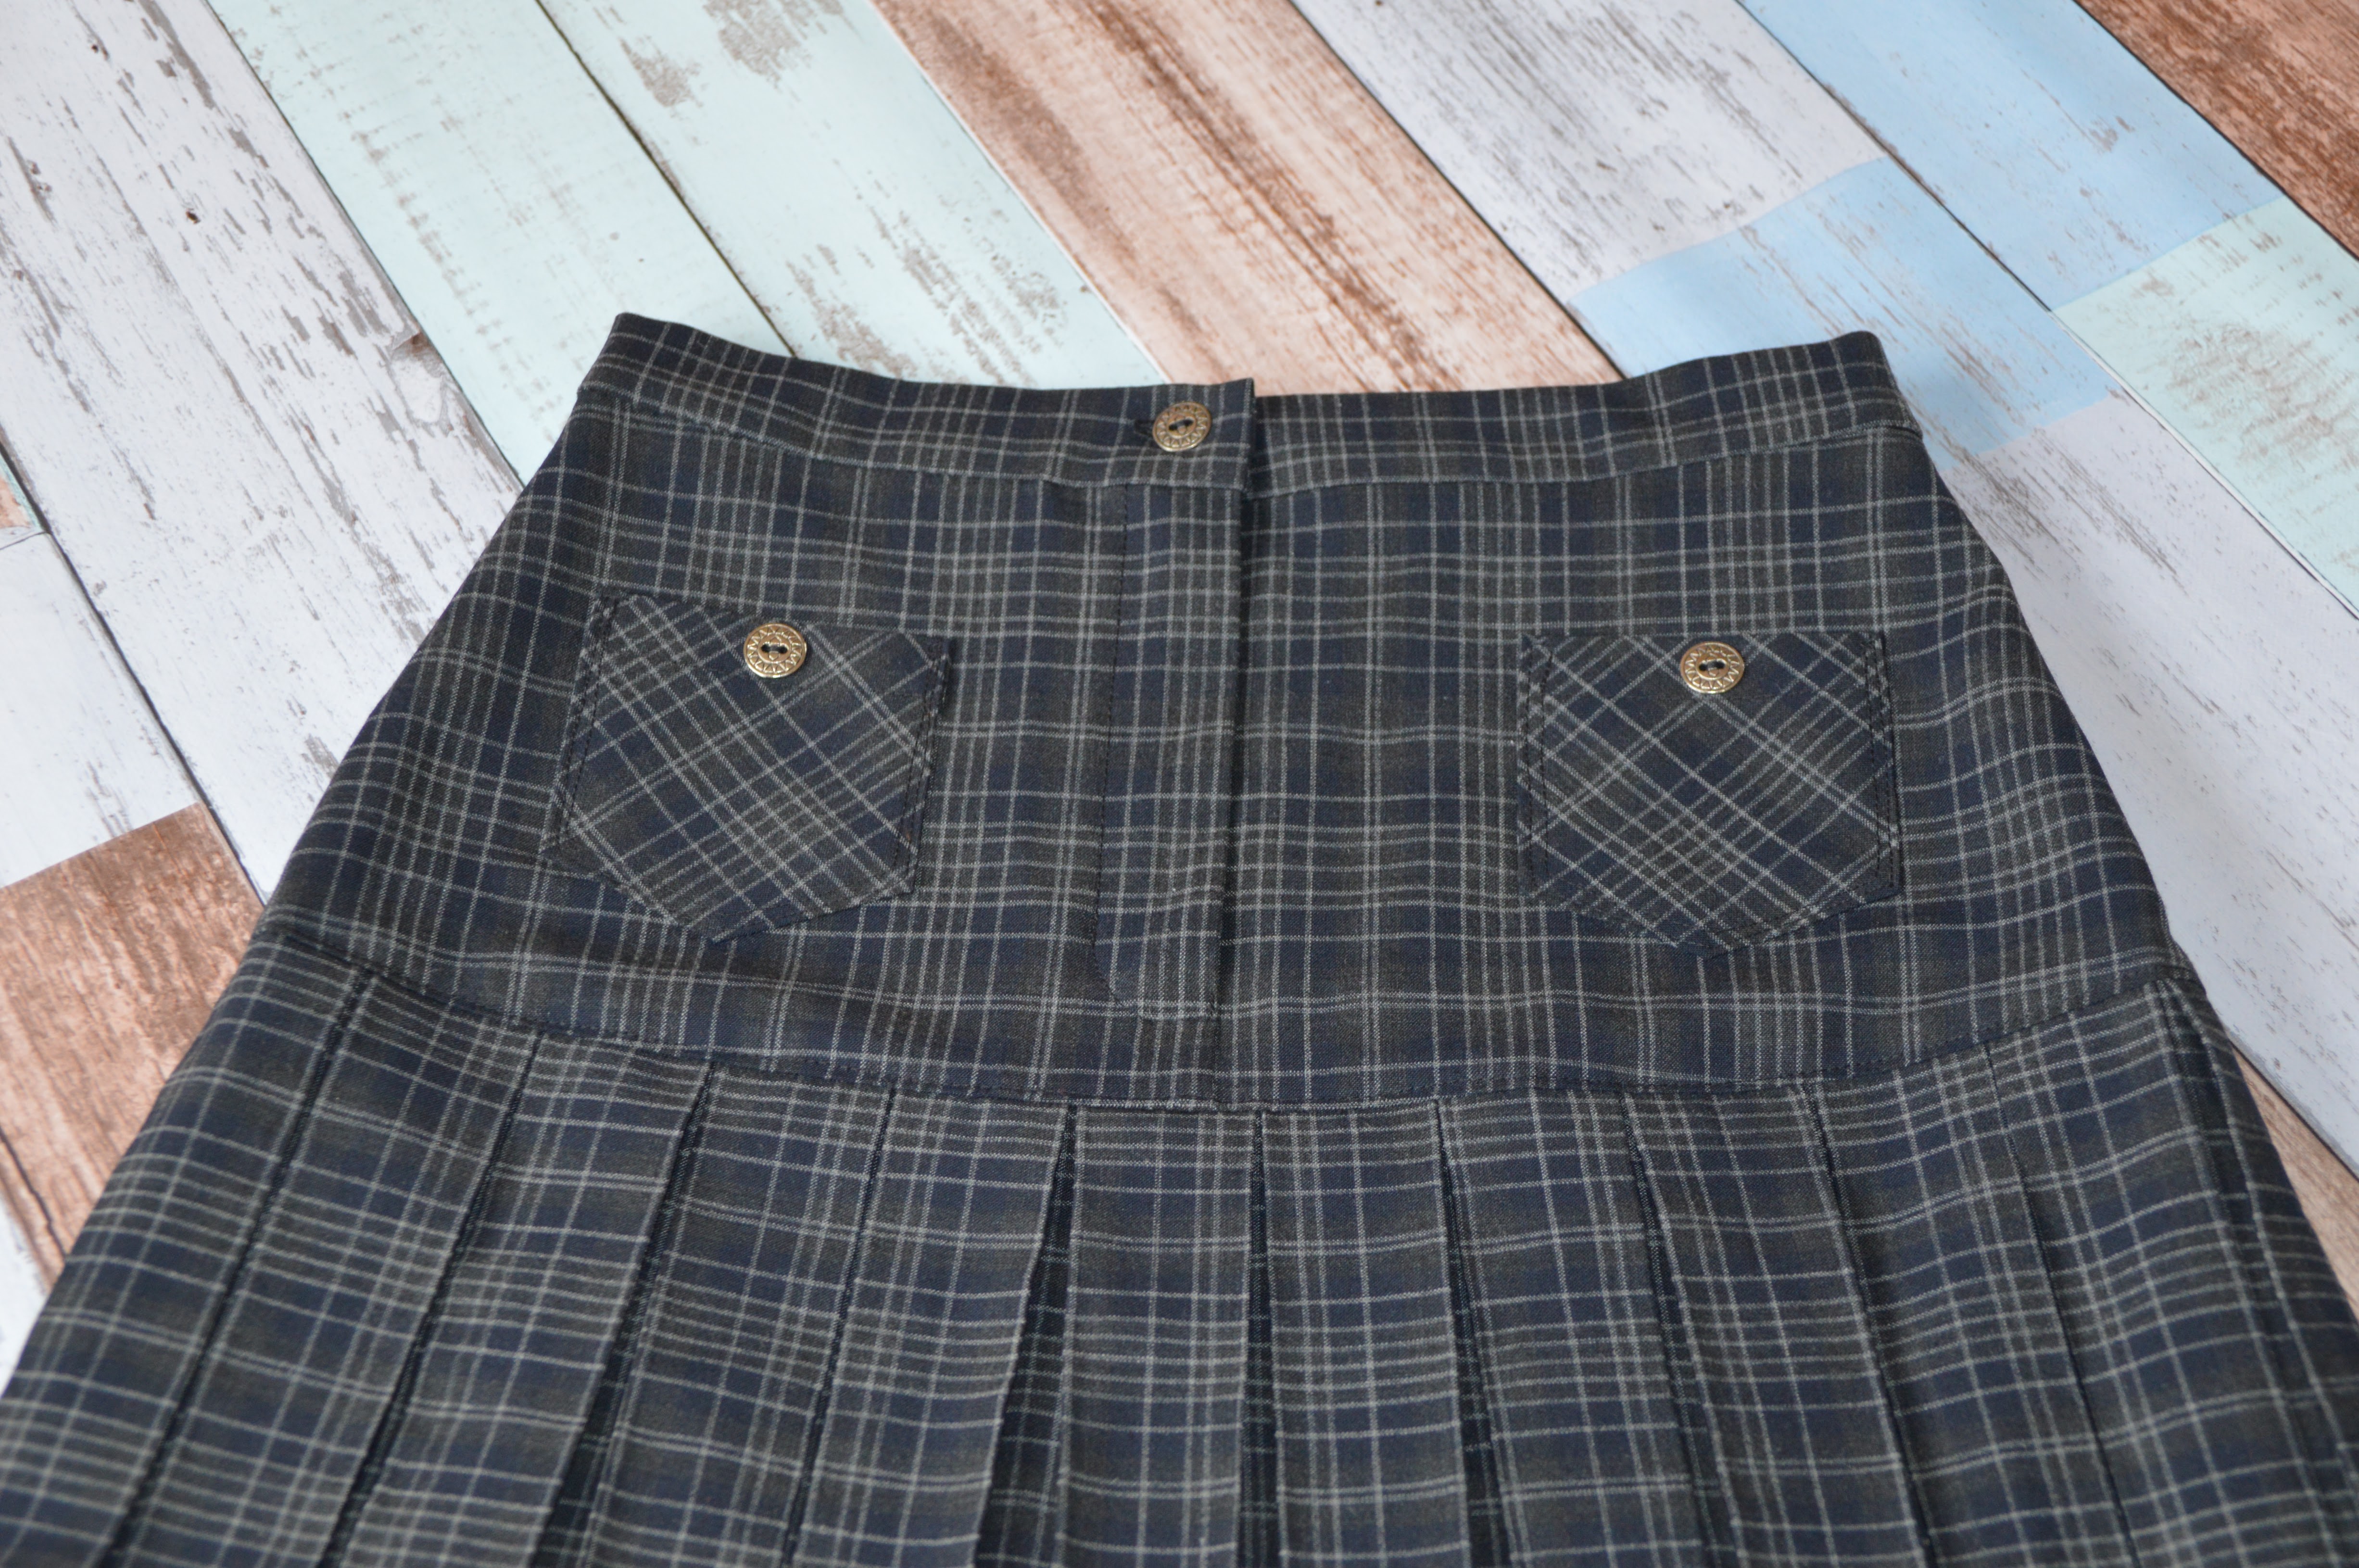
sleeveless dress pattern in Russian, which comes free for my size 42 (the smallest available). The dress features semi-full skirt, princess seams and wrap top. The pattern includes facing pieces for the lapels and the collar, but once I cut the fabric, I realized that my wool plaid was too coarse and itchy, so I drafted additional lining pieces for the top and the skirt and made the pinafore fully lined.

Size: 42, shortened in height by 1 cm (top) and 7 cm (skirt)
Fabric: plaid, 100% wool; black cotton voile, 100% cotton (for the lining)
Thread: polyester, black and brown
Time to make: one week

The dress closes with a 30 cm side zipper. Because of the lined wrap top, I was very hezitant to install an invisible zipper - there was no possibility to insert the zipper between the outer and the lining, as they were sewn together because of the wrap. So I opted for an exposed zipper - I think it's OK, though I'm a big fan of invisible zippers.

I had only 1.2 m of this wool plaid, which I bought decades ago and I had to squeeze a semi-full skirt and a wrap top with lapels and facings, so some compromises had to be made with the pattern matching and especially the symmetry at the back. But I knew that from the very start and I made a deal with my perfectionist self to deal with it and not think about it twice. I managed to match the horizontal lines of all those princess seams, so that should be good enough :))

I am especially proud of the lapels - my first ever! The Shkatulka instructions were very sketchy and I was not quite sure I liked the proposed order of constructing the top, so I googled Youtube. I highly recommend Diane Deziel's tutorial - as always she's the best and made the daunting lapels fairly easy to make!

Another problem I had to deal with was the construction of the lining - the facing of the lapels was only partially equal to the outer front lapels, so to avoid constructing the facing of the fronts out of partial front lapel plus the side front part, I drew a new side panel, which incorporated both parts and I think it worked! I'm still curious how was I supposed to add the side zipper, given that in order to add the skirt to the top I had to fix the wrap, as a result of which the lining and the outer of the top became inseparable. I'd be curious to know how this is done in the industry, I'm sure there are some professional tricks, but I couldn't find a Youtube tutorial, though I searched extensively.

All in all, I'm quite pleased with my 60s style plaid pinafore. If I ever decide to repeat the pattern, I'll have to figure out how to make it a bit more fitted at the bust, but otherwise the fit is acceptable and I was happy to walk the aisles of Lidl today dressed prettily :)


Thursday, December 24, 2020

Plaid Pleated Skirt

The second skirt and the last item I made out of my 2 m plaid wool fabric - a pleated skirt for Gaby. I designed the skirt myself, using pattern 112A from Burda 03 / 2020 for the yoke of the skirt. The smallest size of the pattern is 36, and as Gaby is 34, I reduced the pieces of the pattern by 1 cm.


The original Burda skirt has an invisible zipper on the side, but I though a fly front zipper would be more appropriate for the style I was going for with this skirt. This is my first ever fly front zipper and I am very, very happy with how it came out. I watched two video tutorials and followed them step by step to make mine.

I also decided to add two small decorative pockets to the front, to add a bit of interest to the skirt.


To make the pleated part I measured the width of the yoke at the hip, tripled the length and cut a rectangular piece of fabric of the calculated length and about 30 cm in width. Then I carefully folded and ironed each pleat, basted it in place and then heavily ironed the whole pleated part again and left it to sit basted for a week, to fix the pleats.


The inside of the skirt. The overlocked edges make garments look so much more professionally made, I'm pretty happy with my work on that skirt :)


Pattern: Pleated Skirt, self-drafted, partially using #112 from Burda 03 / 2020
Fabric: wool with elastane
Size: 36, reduced
Thread: black polyester
Time to  make: 3 days


Friday, December 11, 2020

Plaid Pants


Last year a friend gifted me a box of fabric pieces and this plaid fabric was one of them. I wracked my brains what to make out of it and I decided on a pair of pants. I bought the pattern this spring together with a jacket pattern and I have another piece of fabric intended for them, but I wanted to test the pants first. The pattern is pants 113 A from Burdastyle 08 / 2017, designed for petite sizes. Obviously, the pretty woman that models the pants in the magazine, is not petite, because the pants sit on her truly shortened, as they are supposed to be. However on petite women they are almost full length - I had to add only 3 cm to make them the length they are. As I was sewing them from wool fabric for the winter season, I wanted them as long as I could wear.

The pattern is simple and easy and was fun to sew. I fall in between sizes 17 and 18, closer to 18 in my lower part, but I decided to cut 17 with 1.5 cm seam allowance and sew the parts with 1 cm seam allowance. Thus the pants feel comfortable and not too tight, I believe size 18 would have been big on me.


Size: 17, slightly modified
Fabric: wool with elastane
Thread: black polyester
Time to make: 2 days


I sewed the pants on the straight sewing machine, serging all the raw edges on the overlocker in advance. The pants close with an invisible zipper and I hand hemmed the legs.


Friday, October 26, 2018

Blue Burda 6849 Shirt


I sewed I new shirt and I'm so proud with it! The pattern is Burda 6849 from their Autumn / Winter 2015-2016 catalogue. This is a classic fitted shirt from their young fashion collection. It is my first experience with a Burda individual pattern, until now I had only sewed from their magazines.


The advantages of an individual pattern are the much more detailed instructions, the easier copying of the pattern pieces and the multilanguage book, which included two of the languages I understand - English and Russian, instead of only German, as is in the magazine, which is sold here. Still, the instructions were not clear enough for an inexperienced seamstress as I am, but thank God for youtube tutorials! I learned so much about shirt construction!


The fabric I chose for my first try (there will be other shirts from this pattern, for sure) is plain plaid cotton, very easy to sew. Gaby has plenty of plaid shirts in the red range of colors, so she insisted on a different color scheme. I was not sure of my choice of fabric when I brought it from the shop, but now, that it has turned into a shirt I like it and I think it suits her.


I made some small modifications to the pattern - mostly shortened its length and added arrows to the sleeves, as Gaby likes to wear them rolled up and buttoned.


Most of the seams are flat seam - something new I learned with this shirt. And I also made my own buttonholes.


I love the fitted look of this pattern and I do plan to sew many more shirts from it.