Showing posts with label alpaca. Show all posts

Monday, December 31, 2018

Denim Beanie


My last project for 2018 - a quick beanie, using a recycled yarn and a version of Copycat C.C. beanie I adapted for bulky yarn.

A few words for the yarn. I bought it at the end of 2011 and knitted a beanie, that was supposed to be slouchy, but I ran out of yarn - the ball was only 130 m. I did love and wear the hat for probably a month and then the brim loosened and the hat kept falling over my eyes, so I put it back in the yarn box for reknitting.


A year later, in the winter of 2013 I reknitted it. I used an additional yarn for the inside of the double brim and I made it in a different style. It was a very uncomfortable hat - neither beanie, nor slouchy, too heavy to drape and too big to stay put on my head. I tried to wear it a few times and it quickly ended back in the yarn box, awaiting new restyling.


And it stayed there for almost 6 years. A week ago, after I had finished the Copycat C.C. Beanie for Gaby, I took it out, frogged it and glazed the yarn in dark denim. I think the original color was too loud with the contrast from white to black, the new glazed yarn is more subtle and the colors are better pulled together, IMHO. And the tag and pompom add a more contemporary vibe to it. Now I hope I can wear it, finally :)


Pattern: Copycat C.C. Beanie, adapted for bulky yarn
Yarn: Lanoso Alpacana, wool alpaca acrylic blend, 130 m
Needle: 4.5 mm, 5 mm
Time to knit: 2 days


Wednesday, December 12, 2018

WIP: Raspberry Heart


My Raspberry Heart sweater, which I'm knitting with the yarn I dyed last month, is almost done and it's going really well. It is again a sweater designed by me, boxy shape, reverse stockinette stitch with a small heart cable, split twisted stitch rib, drop shoulder, rounded neckband. Initially, when I first conceived the idea of this sweater I had just heard of the NaNoSweMo - National Sweater Knitting month and I thought this could be my participation in it. But I was then in the process of finishing my Wisteria sweater and I had to choose between starting a new big project and finishing a long-standing WIP. I chose the latter and I think I did right. I'll certainly be able to finish the new sweater within a month, just not in the month of November. I started it on Nov 23rd and I have about half a sleeve and the rib of the other sleeve to do, so I reckon I have enough time to finish it. And it could be my this year's Christmas sweater for Gaby, I could make it a tradition there with her black brioche sweater I gifted to her for last Christmas and the Mondrian Color Block Cardigan for the Christmas of 2015 :)


Because my yarn is hand dyed, this time I decided to alternate skeins. I'm using the Felix method for alternating in the round and it works brilliantly - smooth transition and no strands pulling the knitting, I highly recommend it!


The back of the sweater is plain reverse stockinette and as I'm knitting it in the round, the body was all smooth thoughtless stockinette knitting with just a small cable to break the monotony and facilitate the keeping track of my progress.
To spice up a bit the plain back I added just a single heart "tattoo" between the shoulders.


For the sleeves, after several false starts in reverse stockinette, I decided to knit them in stockinette stitch, picking up the stitches from the body and adding a few short rows for a smoother transition. I had plans to make the sleeves different, I have a very soft spot for balanced asymmetry, but in the end I'll leave them plain. And I'm not alternating skeins for them, I think the skeins are identical enough so that the sleeves look the same, knitted from the two skeins each. So far it seems 200 g will be enough for a whole sweater, the yarn is again fingering weight (500 m / 100 g) and it will be a small light sweater. A bit about the yarn - this is the first time I'm knitting with it and I'm not very happy - it's scratchy. I got spoiled with those superfine Italian merinos I've been knitting lately and this alpaca/merino blend is surprisingly rustic and itchy. I hope washing will soften it, but I'm not buying it again - there are so many new interesting yarns to try and other quality yarns to repeat knitting with.


Thursday, November 22, 2018

50 Shades of Pink


Last week I finally finished a sweater out of hand-dyed yarn I started back in April and I just had to fill with stitches those needles again. I had a bobbin of 300 g of white Pecci Filati Pacchero with a very interesting content - 16% alpaca superfine, 26% merino, 13% viscose, 30% acrylic, 15% nylon. I knew some of the fibers would dye perfectly with acid dyes, some not at all (like the 30% acrylic), but I still wanted to dye it and see what would happen. I wound the yarn into three 100 g skeins and went downtown in search of red dyes.

I applied a two step method for dyeing this yarn - first low immersion dyeing with the four shades of red acid dyes, sold domestically:
  • red, 
  • scarlet - a bit orangy red, 
  • pink - kind of diluted red, I'm not sure the chemical composition is different from the red dye
  • bordeaux - which seems to be red and blue and makes for purple nuances.
This is  one of the skeins, dripping wet, after the first stage of dyeing.


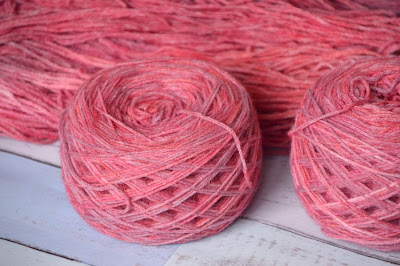
After all of the three skeins had been dyed in red, I made some resist knots on the skeins and dipped them in very diluted solutions of grey dye to get a richer palette of shades. The final yarn, dry and ready to knit, is a bit pale, as only about 50% of it took any dye, but I think it's lovely and will make a nice light sweater.

I've made a raw design already and last night I started sampling to get the gauge. The yarn is quite thin - 500 m / 100 g, so I think 3 mm needles for the rib and 3.25 mm for the body make a good texture. I might sample it further with 3.5 for the body, just in case :)

It's been rainy and cold lately


and I have TWO finished projects to photograph and show you. Let's hope it will be sunnier during the weekend.

Wednesday, February 17, 2016

Boot Cuffs


Gaby wanted a pair of boot cuffs and I planned to make one from the yarn I recently dyed in burnt orange colors. Then I finished the poncho and was left with some 70 g of yarn, so I decided to knit the boot cuffs from that yarn. But the process of planning and designing had already started and it took me a couple of days to see the obvious - no new pattern was required, I had to make the cuffs using the cables from the poncho and make them a set, duh!


Pattern: Boot Cuffs
Yarn: Macas Baby Alpaca, 70 g
Needle: 4 mm rib, 4.5 mm body
Time to knit: 5 days


And a couple of photos of the Valentine cake Gaby made for us, just because I love this pomegranate heart on top - it's like made of jewels :)


Thursday, February 11, 2016

French Poncho Modeled


Ta-da! The poncho in action. Gaby wore it to school yesterday morning and we met at noon to take a few photos of the new knit on her way back home. I am very pleased how this poncho turned out and I hope it'll get lots more wear this winter and spring.


Pattern: Ponchoby Bergère de France 
Yarn: Macas 60% Baby Alpaca, 20% Merino, 20% PA, 430 g
Needle: 4.5 mm body, 4 mm rib and I-cord
Time to knit: 3 weeks


Sunday, February 7, 2016

Poncho By Bergère de France. Modifications and Details

On Tuesday I blogged about my work in progress - the Poncho by Bergère de France, some of the modifications I had already done and some planned and I said I would take a break from the poncho to knit some legwarmers in the yarn I had dyed that day. But approaching the end of Part 1 of the Poncho my knitting mojo kicked in and with the rows significantly shortening I soon found myself knitting faster and faster to finish it quicker. I also noticed that I'll have some yarn left and I could do the legwarmers in the alpaca and make them a set with the poncho. As I did quite a lot of modifications on Part 2 and I believe they might be of interest to other people planning to knit this beautiful free pattern (one of the best ponchos out there, IMHO), I'll try to sum them up:


Part 1:
1. I cast on 384 sts with provisional cast on, knit 4 rows of St st and with 4 mm circular needle. Changed to 4.5 mm circular needle and began with the pattern - 25 sts for the cable part and 23 sts for the stockinette sections. My first decrease was as per instructions - on the 15th row from the cast on row.
2. For Part I I followed the instructions and made the decreases on every 8th row until I was left with 224 sts - 200 sts for the 8 Cable parts (8 x 25) and 8 x 3 sts in the St. sections. I knit 5 rows on the remaining 224 sts.
3. I also made the decreases to slant to the inside of the stockinette section and not vice versa as in the pattern.

Apart from casting in the round and reducing the stockinette section by two stitches, which led to less width and 8 rows less in length (one less decrease), I pretty much followed the pattern in this section.

(I forgot to take a close-up picture of this part in the day time, thus the different color)

Judging by the work done by other ravelers  on this pattern and my calculations, Part II comes too wide and not at all high necked as in the pattern photo. So I made the following changes to the pattern:

Part II
Do the decreases, meanwhile continuing with the cable pattern.
1. Row 1 - Decrease each 3-st Stockinette section into 1 st: 224 -> 208 sts
2. Row 2 - knit 208
3. Row 3 - Decrease the one knit stitch, that remained in each St section. The two purl st columns are now combined into one 4 stitch column: 208 -> 200 st
4. Row 4 - Knit 200 sts
5. Row 5 - Decrease one purl st in each four purl column. Now you have 16 cable columns, divided by 16 3-st purl columns: 200 -> 192 sts
6. Rows 6 to 12 (a total of 8 rows) - knit 192 sts
7. Row 13 - Decrease one purl st in each 3-st purl column: 192 -> 176 sts
8. Rows 14 to 20 - knit 176 sts
9. Row 21 - Decrease one purl st in each 2-st purl column: 176 -> 160 sts
10. Rows 22 to 28 -  knit 160 sts
11. Row 29 - Decrease the last purl st in each 1-st purl column: 160 -> 144 sts
12. Rows 30 - 34 - knit 144 sts


In this part the purl stitches are done with and the decreases are made within the cables:
13. Row 35 - decrease one stitch in each 9 sts cable: 144 -> 128 sts
14. Rows 36 to 40 - Knit 128 sts
15. Row 41 - decrease one stitch in each 8 sts cable: 128 -> 112 sts
16. Rows 42 to 44 - knit 112 sts
17.  Row 45 - decrease one stitch in each 7 sts cable: 112 -> 96 sts
18. Rows 46 to 48 - knit 96 sts
19. Row 49 - decrease one stitch in each 6 sts cable by knitting two knit stitches as one purl stitch. Now your have sixteen 4-st cables divided by 1 purl stitch each : 96 -> 80 sts
Change to 4 mm circular needles:
20. Rows 50-52 - knit 80 sts
21. Row 53 - Decrease every other purl stitch. Thus you have eight sections of cables, divided by a purl stitch. 80 -> 72 sts.
22. Rows 54 - 69: knit 72 sts, continuing the cables every 8th row
23. Row 70: cast off. I used 2-st attached I-cord.

Part III - The Sleeves

As my cast on stitches were alive, I knitted the sleeves seamlessly attached to the body by picking up the 25 sts of the cable + 3 sts on each side of the cable + 9 sts cast on with provisional cast on = 40 sts total. I knit 33 rows of 2x2 rib, 1 row of 1x1 rib by switching stitches, 1 row of double knit and I cast off using invisible cast off. This is a stretchy, yet very neat method to prevent sleeve rib ends from flaring.

After knitting the two sleeves I cast off all of the provisional cast on stitches of the body and the sleeves in one continuous 2-st I-cord.


The above description is more like a recipe rather than complete instructions. You have to figure out the cables for yourselves and your gauge might be different than mine or may be the same, but on different needle sizes. I got the same gauge as in the pattern: 16 sts x 22 rows in St st for a 10 cm square and one 9-sts cable is 5 cm on 4.5 mm needles.

Modeled photo-session - coming soon, I hope!


And who said adults can't have fun - I wound up my newly hand-dyed yarn on the cone, left from the alpaca, using my daughter's pottery wheel. The result isn't exactly spectacular, but it was fun :)))

Tuesday, February 2, 2016

WIP - Poncho by Bergère de France


This is my current project, that I've been working on very slowly for two weeks now - Poncho by Bergère de France. I'm knitting it with my Baby Alpaca cone yarn on 4.5 mm circular needles. The first rows of 384 stitches, approx. 260 cm long, gathered on 60 cm circular needle were a torturous slog, but it's a breeze now. So far my modifications - as many others on Ravelry, I modified the pattern to knit it in the round. In the original it is knit in two parts, which are then sewn together - completely unnecessary. And knitting in the round makes it possible to purl all the time, which is my preferred method of knitting, as I knit with the yarn held in front. For this purpose I knit it from the wrong side and of course I had to modify the cables, so that they would appear as per pattern on the right side. i also modified the decreases to be slanting toward the stockinette stitch part, and not in the opposite direction, as is in the pattern.


My gauge was spot on - 16 sts and 22 rows on 4.5 mm, but I cast on 16 sts less - 25 sts for the cable section, but 23 instead of 25 sts for the stockinette stitch sections between the cables. My daughter is slim and only 5'4", so I'm trying to make it smaller than the given dimensions for the S/M size.  I'm almost at the end of Part 1 of the poncho, tonight I intend to put the stitches on a longer cord and try it on on Gaby to determine how long should the poncho be and how to proceed with the decreases. The pattern states a length of 76 cm for the S/M size, but I think 65 cm would be enough, so for Part 2 I'll probably make my decreases on every 6th row instead of every 10th row. 


I cast on with provisional cast on, as I haven't decided yet if I want a curling Stockinette stitch end or an I-cord. I'll pick up the stitches and cast them off, meanwhile adding the cuffs seamlessly to the body. The yarn - it's very soft and warm, this will be a very toasty poncho, it's a pity I didn't start it earlier to be ready for the cold January days, but there'll be other winters too :))


And something else - I hadn't dyed yarn for more than a year. This is a skein of white 100% wool, 100 g = 220 m, dyed with yellow, red and brown acid dyes for wool and silk. The color is slightly nuanced burnt orange / brick, which I love so much. I'm planning a pair of cabled legwarmers / boot cuffs for Gaby, they'll be a nice break from the monotonous work on the poncho.