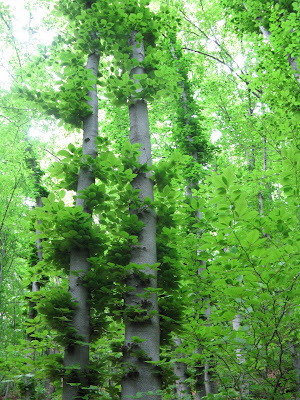
Today we went to the Boyana Waterfall (height 15 m ) - a 4 hour walk through the woods up and down the mountain with a delicious picnic on the grass. Vitosha mountain is so-o-o beautiful in May. The woods looked like some rain forests from a Lara Croft adventure. I don't know why, but I find green grass, moss and forest flowers and trees absolutely fascinating. I couldn't stop myself from taking pictures all the time.
On the way back from the waterfall we decided to take our adventure to the extreme and to climb down the steep path along the riverbed. It was STEEP!, muddy, slippery and a thunderstorm accompanied us all the way down - luckily just thunders, no rain. The children are big fans of Bear Grill's Ultimate Survival and we joked that this was a sort of a first hand experience, though so close to the big city and civilization :)
Monday, May 23, 2011
Poncho
Pattern: Green Poncho
Yarn: Lory 60% wool 40% acrylic
Needle: 6 mm
I made this poncho for my daughter a couple of years ago, after I saw a picture of two girls in ponchos on the Internet. The pattern is as simple as ponchos go - two identical rectangles, sewn together. I knit it in fisherman's rib and self-striping yarn, adding a neckband for structure and fringes.
Saturday, May 21, 2011
Arielle Outdoors
Thursday, May 19, 2011
In The Making
The fruit trees under our windows -
the peaches,
the cherries,
the wild plums,
the geranium on the kitchen sill
are all in the making. And so is my Sea Gray Vine Cardigan:
Can't wait to get it finished. The pattern is very ingenious, knit sideways in garter stitch with a beautiful lace border. It is a fairly quick knit too - it took me almost three days to get into the mood of the pattern, but thence it's been a breeze!
Monday, May 16, 2011
Beading in Higher Doses
Beaded bracelets turned out to be great fun and an instantly gratifying project. One bracelet takes no longer than an hour to make, the materials are inexpensive, the possibilities - limitless. The bracelets make not only nice summer accessories, but also sweet little gifts for your friends and coworkers.
Based on the beaded knit bracelet pattern in the previous post, I've been experimenting with some charted beading. The idea is to create a stack of beads on the yarn - first in, last out. The most convenient bracelet size turned out to be 9 rows of beads and 49 stitches, which gives us 24 beads per row. 24 is a very nice number, as it is divisible by 2, 3, 4, 6, 8, 12 and therefore provides flexibility for bead charting.
So, the first step is to create the chart. Here is a very simple one:
The crude lines on the sides show the path of the yarn. When threading the beads it is essential to follow these two basic rules:
1. Thread the beads, starting from the upper left corner of the chart, that is the last bead to be knit.
2. Follow carefully the path of the yarn through the rows of beads, otherwise you'll get a messed up picture.
This is what you might actually expect to get and some other ideas:
These I've knit so far:
Thursday, May 12, 2011
Beaded Knitted Bracelet
For a bracelet 7" (approx. 18 cm) in circumference, 1/2" (1.4 cm) width:
Cotton or cotton blend yarn (I'm demonstrating YarnArt Jeans 55% cotton, 45% acrylic), 320 m / 100 g; 3-4 mm beads; 2 mm (US 0) size needles
Thread 5 x 25 beads = 125 beads.
Cast on (preferably crochet cast on) 51 stitches.
Place bead means slide the bead along the yarn closely next to the stitch on the right needle, which has been just purled or knitted.
PB = place bead
P = purl one stitch
K = knit one stitch
()* = repeat this sequence
For the first row of the bracelet:
P, (PB, P, P)* to the last stitch
Second row - knit
K, (PB, K, K)* to the last stitch
The beads appear always on the same RS (right) side of the bracelet and in a chess-board order.
Repeat rows 1 and 2 once more, then row 1 again, for a total of 5 rows.
Cast off on the WS knitwise. Cut the yarn, leaving 8" (20 cm) for sewing.
Connect the edges with mattress stitch, weave in ends. The bracelet is ready.
You can make them wider by adding more rows (don't forget to thread the respective number of beads in the beginning). If you need your bracelet larger, increase the number of stitches (always an odd number) and calculate the number of beads you need per row: (number of stitches - 1) : 2
This post has been linked to Natural Suburbia, a place for creativity ideas
Tuesday, May 10, 2011
Simply Red
Name: Simply Red
Pattern: Jasmine from Nectar by Kim Hargreaves
Yarn: YarnArt Jeans 26, 150 g
Needle: 3.00 mm
The key word for this pattern is simplicity. Simple design, simple yarn, simple elegance. And the result - simply comfortable, soft and wearable.
Lots of modifications to the pattern to fit my figure and style - less stitches, no seams, no short rows for the neckline. Knitted all in the round up to the raglan decreases, knitted the two sleeves separately in the round to their respective raglan decreases, then connected the sleeves to the body with 3-needle stitch, separated the neck for the buttonbands and continued back and forth, decreasing for the raglan the back, the fronts and the sleeves simultaneously.
Labels:
Jasmine,
kim hargreaves,
knitted blouse,
raglan
Subscribe to:
Posts (Atom)